8i | 9i | 10g | 11g | 12c | 13c | 18c | 19c | 21c | 23ai | Misc | PL/SQL | SQL | RAC | WebLogic | Linux
SQL Developer 3.1 Data Pump Wizards (expdp, impdp)
SQL Developer 3.1 includes a neat GUI interface for Data Pump, allowing you to do on-the-fly exports and imports without having to remember the expdp/impdp command line syntax. This article gives an overview of these wizards.
Related articles.
- Data Pump (expdp, impdp) : All Articles
- Data Pump Quick Links : 10g, 11g, 12cR1, 12cR2, 18c, 19c, 21c, Transportable Tablespaces
General Points
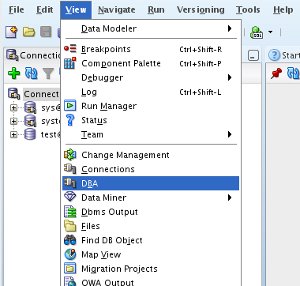
The data pump wizards are accessible from the DBA browser (View > DBA).
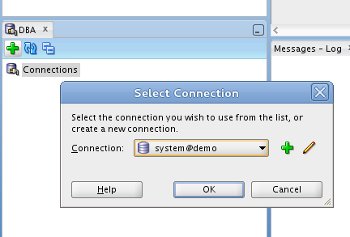
If no connections are available, click the "+" icon and select the appropriate connection from the drop-down list and click the "OK" button. In this case I will be using the "system" connection.
Expanding the connection node in the tree lists a number of functions, including "Data Pump". Expanding the "Data Pump" node displays "Export Jobs" and "Import Jobs" nodes, which can be used to monitor running data pump jobs.
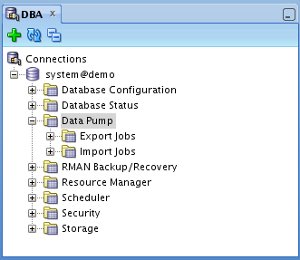
This tree will be the starting point for the operations listed in the following sections.
Exports (expdp)
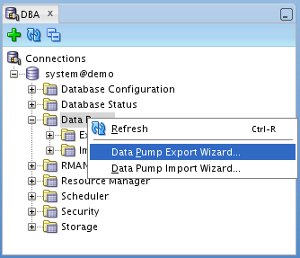
Right-click on either the "Data Pump" or "Export Jobs" tree node and select the "Data Pump Export Wizard..." menu option.
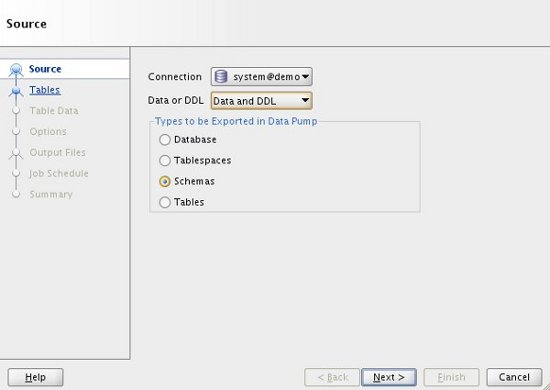
Check the connection details are correct and select the type of export you want to perform, then click the "Next" button. In this case I will do a simple schema export.
The screens that follow will vary depending on the type of export you perform. For the schema export, we must select the schema to be exported. To do this, highlight the schema of interest in the left-hand "Available" pane, then click the ">" button to move it to the right-hand "Selected" pane. When you are happy with your selection, click the "Next" button.

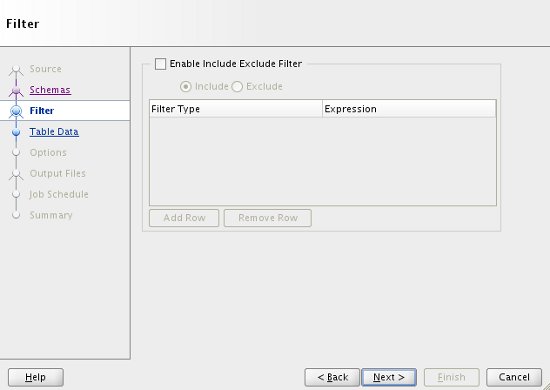
If you have any specific include/exclude filters, add them and click the "Next" button.
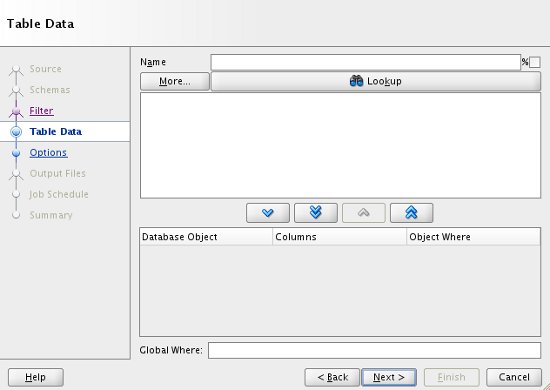
If you want to apply a WHERE clause to any or all of the tables, enter the details in the "Table Data" screen, then click the "Next" button.
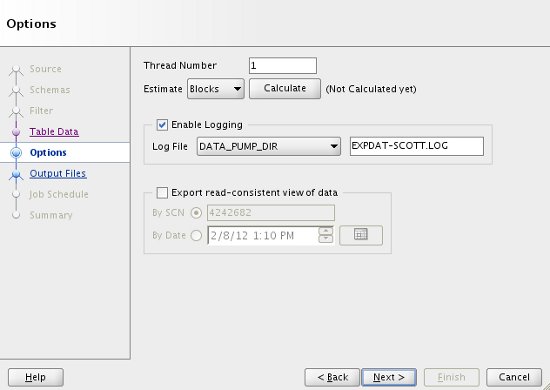
The "Options" screen allows you to increase the parallelism of the export, name the logfile and control the read-consistent point in time if necessary. When you have selected your specific options, click the "Next" button.
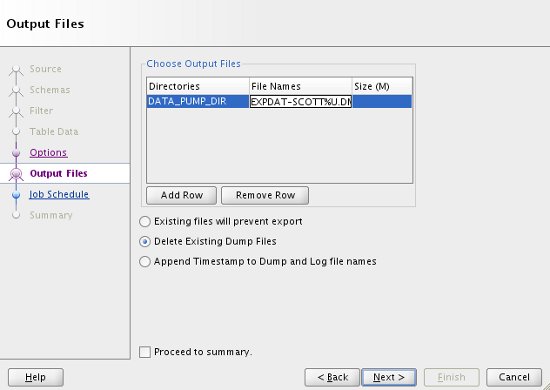
Enter a suitable dump file name by double-clicking on the default name and choose the appropriate action should the file already exist, then click the "Next" button.
If you want to schedule the export to run at a later time, or on regular intervals, enter the details here. The default is to run the job immediately. Click the "Next" button.

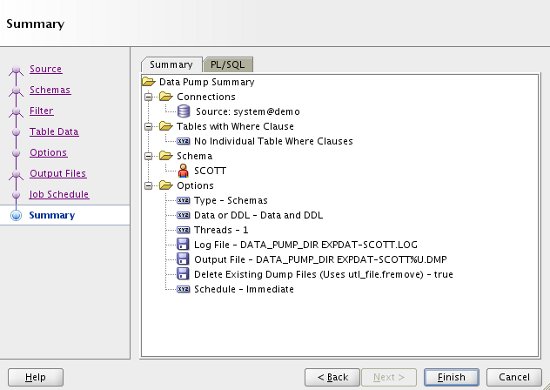
Check the summary information is correct. If you need to keep a copy of the job you have just defined, click on the "PL/SQL" tab to see the code. When you are ready, click the "Finish" button.
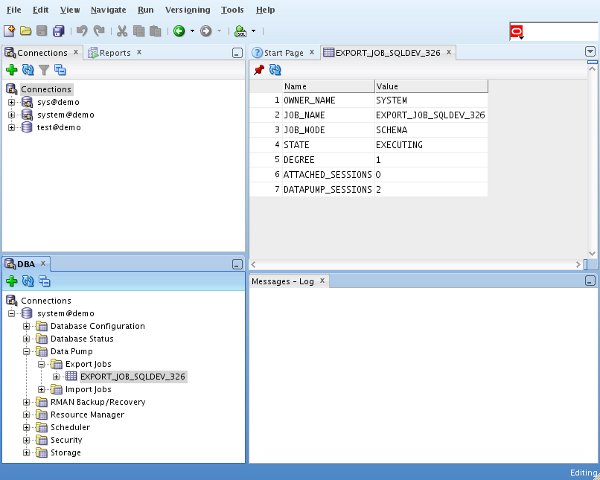
Once the job is initiated, it can be seen under the "Export Jobs" node of the tree, where it can be monitored.
As normal, the dump file and log file are located in the specified directory on the database server.
Imports (impdp)
In this section we will import the SCOTT schema, exported in the previous section, into a new user. The new user was created as follows.
CREATE USER scott_copy IDENTIFIED BY scott_copy
  DEFAULT TABLESPACE users
  TEMPORARY TABLESPACE temp
  QUOTA UNLIMITED ON users;

GRANT CREATE SESSION, CREATE TABLE to scott_copy;
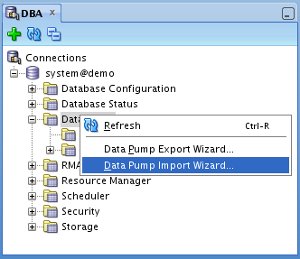
Right-click on either the "Data Pump" or "Import Jobs" tree node and select the "Data Pump Import Wizard..." menu option.
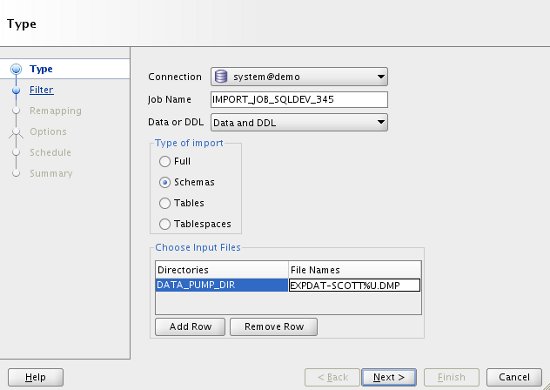
Enter the type of import you want to do and the name of the dump file that is the source of the data, then click the "Next" button.
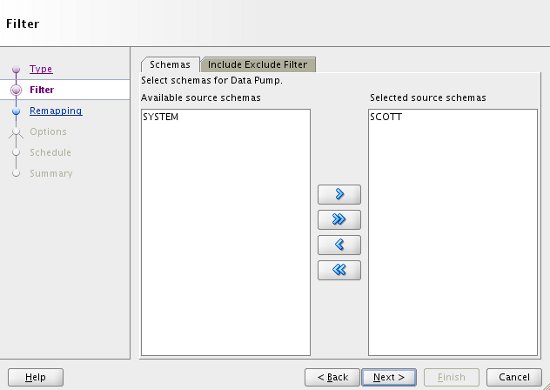
The screens that follow will vary depending on the type of import you perform. Wait for the utility to interrogate the file, then select the schema of choice. If you need any specific include/exclude filters, they can be added in the "Include Exclude Filter" tab. Click the "Next" button.
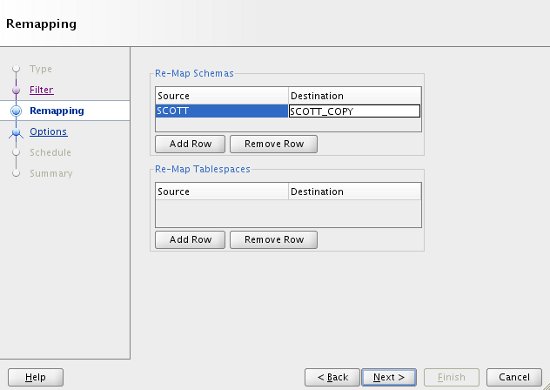
To load the data into a new schema, we need to add a REMAP_SCHEMA entry. Once this is done, click the "Next" button.
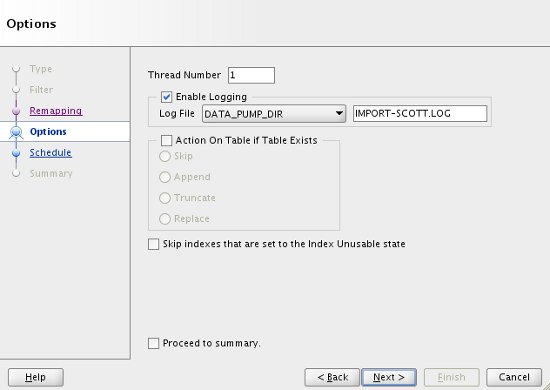
The "Options" screen allows you to increase the parallelism of the import, name the logfile and control the action if tables or unusable indexes exist. When you have selected your specific options, click the "Next" button.
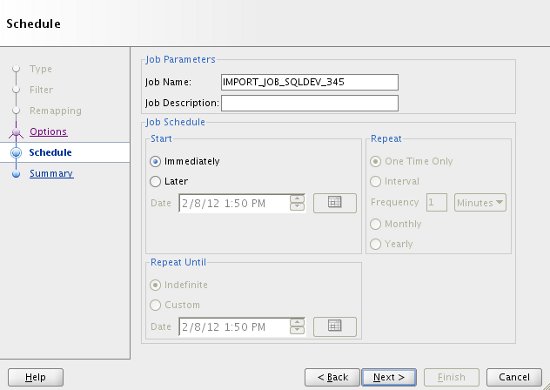
If you want to schedule the import to run at a later time, or on regular intervals, enter the details here. The default is to run the job immediately. Click the "Next" button.
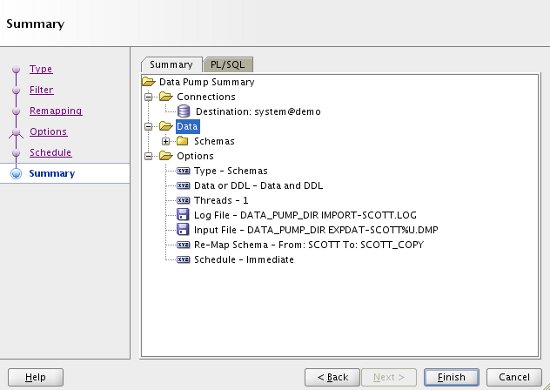
Check the summary information is correct. If you need to keep a copy of the job you have just defined, click on the "PL/SQL" tab to see the code. When you are ready, click the "Finish" button.
Once the job is initiated, it can be seen under the "Import Jobs" node of the tree, where it can be monitored.

As normal, the log file is located in the specified directory on the database server.
Once the import is complete, we can see the tables have been imported into the new schema.SQL> SELECT table_name FROM dba_tables WHERE owner ='SCOTT_COPY'; TABLE_NAME ------------------------------ DEPT EMP SALGRADE BONUS 4 rows selected. SQL>
For more information see:
- Oracle SQL Developer User's Guide Release 3.1
- Data Pump (expdp, impdp) : All Articles
- Data Pump Quick Links : 10g, 11g, 12cR1, 12cR2, 18c, 19c, 21c, Transportable Tablespaces
Hope this helps. Regards Tim...