8i | 9i | 10g | 11g | 12c | 13c | 18c | 19c | 21c | 23c | Misc | PL/SQL | SQL | RAC | WebLogic | Linux
Oracle Application Server 10g Release 3 (10.1.3) Installation On Fedora Core 5 (FC5)
In this article I'll describe the installation of Oracle Application Server 10g Release 3 (10.1.3), Oracle's J2EE Application Server, on Fedora Core 5 (FC5 X86). The article is based on a server installation with a minimum of 2G swap, secure Linux disabled and the following package groups installed.
- Editors
- Graphical Internet
- Administration Tools
- Base
- X Window System
- System Tools
- Server Configuration Tools
- GNOME Desktop Environment
- Development Libraries
- Development Tools
- Legacy Development Support
- Legacy Server Support
Additional steps may be necessary when starting with a different base OS installation.
Download Software
Download the following software.
Unpack Files
Unpack the contents of the file.
cpio -idmv < as_linux_x86_101300_disk1.cpio
The installation files unpack into the current directory.
Hosts File
The "/etc/hosts" file must contain a fully qualified name for the server.
<IP-address> <fully-qualified-machine-name> <machine-name>
Setup
Add the following lines to the "/etc/security/limits.conf" file.
*        soft   nproc         2047
*        hard   nproc         16384
*        soft   nofile        2048
*        hard   nofile        65536
Add the following line to the "/etc/pam.d/login" file, if it does not already exist.
session required pam_limits.so
The installation guide for the core application server makes no reference to kernel parameters, suggesting that the default values are adequate.
If installing version 10.1.3.1, you must comment out the ANT_HOME line from the "/etc/ant.conf" file, or rename the file so it is not detected.
The documentation states that the following packages are required for RHEL 4.
# Red Hat Enterprise Linux 4.0 and CentOS 4.x (Update 1)
glibc-2.3.4-2.9
glibc-common-2.3.4-2.9
binutils-2.15.92.0.2-13
compat-libstdc++-296-2.96-132.7.2
gcc-3.4.3-22.1
gcc-c++-3.4.3-22.1
libstdc++-3.4.3-22.1
libstdc++-devel-3.4.3-22.1
openmotif21-2.1.30-11.RHEL4.4
pdksh-5.2.14-30
setarch-1.6-1
make-3.80-5
gnome-libs-1.4.1.2.90-44.1
sysstat-5.0.5-1
compat-db-4.1.25-9
control-center-2.8.0-12
xscreensaver-4.18-5.rhel4.2
To install the prerequisite packages in FC5, do the following.
cd /media/disk/Fedora/RPMS
rpm -Uvh glibc-2*
rpm -Uvh glibc-common-2*
rpm -Uvh binutils-2*
rpm -Uvh setarch-1*
rpm -Uvh make-3*
rpm -Uvh compat-libstdc++-296*
rpm -Uvh compat-db-4*
rpm -Uvh control-center-2*
rpm -Uvh libstdc++*
rpm -Uvh ksh*
rpm -Uvh gcc-4*
rpm -Uvh gcc-c++-4*
rpm -Uvh openmotif-2*
rpm -Uvh glib-devel*
rpm -Uvh libIDL-devel*
rpm -Uvh --force ORBit*
rpm -Uvh --force libpng*
rpm -Uvh gnome-libs-1*
rpm -Uvh xscreensaver*
rpm -Uvh sysstat-6*
Create the new groups and users.
groupadd oinstall
groupadd dba
groupadd oper

useradd -g oinstall -G dba -s /bin/ksh oracle
passwd oracle
Create the directories in which the Oracle software will be installed.
mkdir -p /u01/app/oracle/product/10.1.3
chown -R oracle.oinstall /u01
Edit the "/etc/redhat-release" file replacing the current release information (Fedora Core release 5 (Bordeaux)) with the following.
redhat-4
Login as root and issue the following command.
xhost +<machine-name>
Login as the oracle user and add the following lines at the end of the ".profile" file.
# Oracle Settings
TMP=/tmp; export TMP
TMPDIR=$TMP; export TMPDIR

ORACLE_BASE=/u01/app/oracle; export ORACLE_BASE
ORACLE_HOME=$ORACLE_BASE/product/10.1.3/OracleAS_1; export ORACLE_HOME
ORACLE_TERM=xterm; export ORACLE_TERM
PATH=/usr/sbin:$ORACLE_HOME/bin:$PATH; export PATH
PATH=$PATH:$ORACLE_HOME/dcm/bin:$ORACLE_HOME/opmn/bin; export PATH
PATH=$PATH:$ORACLE_HOME/Apache/Apache/bin; export PATH

if [ $USER = "oracle" ]; then
  if [ $SHELL = "/bin/ksh" ]; then
    #ulimit -p 16384
    ulimit -n 16384
  else
    ulimit -u 16384 -n 16384
  fi
fi

PS1="`hostname`> "
set -o emacs
set filec
Installation
Log into the oracle user. If you are using X emulation then set the DISPLAY environmental variable.
DISPLAY=<machine-name>:0.0; export DISPLAY
Start the Oracle Universal Installer (OUI) by issuing the following command in the Disk1 directory.
./runInstaller
During the installation, before the linking phase, edit the contents of the "$ORACLE_HOME/bin/gennttab" file, changing the following entries.
# Change this...
LIB=`$ECHO ${TtoLIB}  | $SED 's/ /
/g' | $GREP "^${T}:" | $AWK -F: '{print $2}'`
INI=`$ECHO ${TtoINI}  | $SED 's/ /
/g' | $GREP "^${T}:" | $AWK -F: '{print $2}'`
BAS=`$ECHO ${TtoBAS} | $SED 's/ /
/g' | $GREP "^${T}:" | $AWK -F: '{print $2}'`

# To this...
LIB=`$ECHO ${TtoLIB}  | $SED 's/ /n/g' | $GREP "^${T}:" | $AWK -F: '{print $2}'`
INI=`$ECHO ${TtoINI}  | $SED 's/ /n/g' | $GREP "^${T}:" | $AWK -F: '{print $2}'`
BAS=`$ECHO ${TtoBAS} | $SED 's/ /n/g' | $GREP "^${T}:" | $AWK -F: '{print $2}'`
If you don't do this the ntcontab will hang indefinitely during the linking phase. The file is created, then subsequently overwritten, so editing the file too early results in your changes being overwritten, so be patient. During my installation the file was created at 35% and overwritten at 79% of the way through the installation.
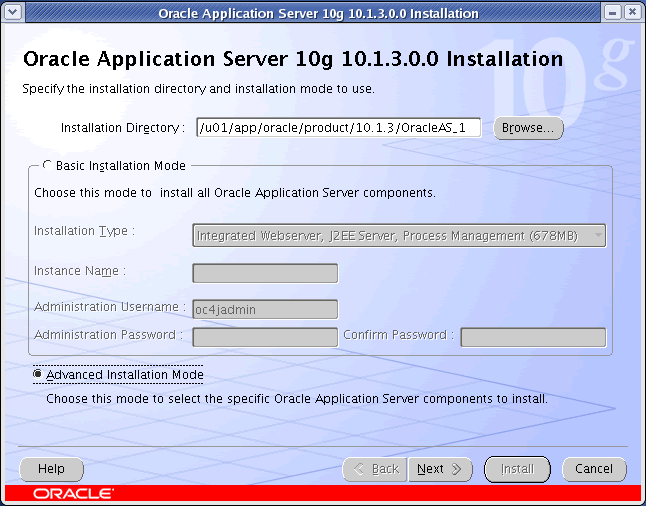
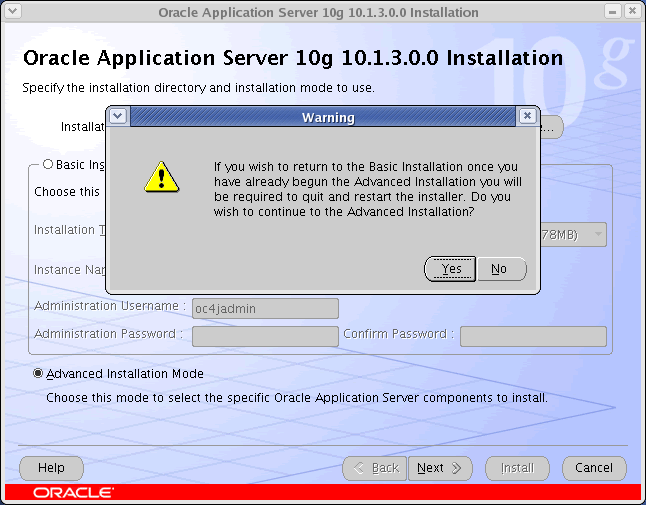
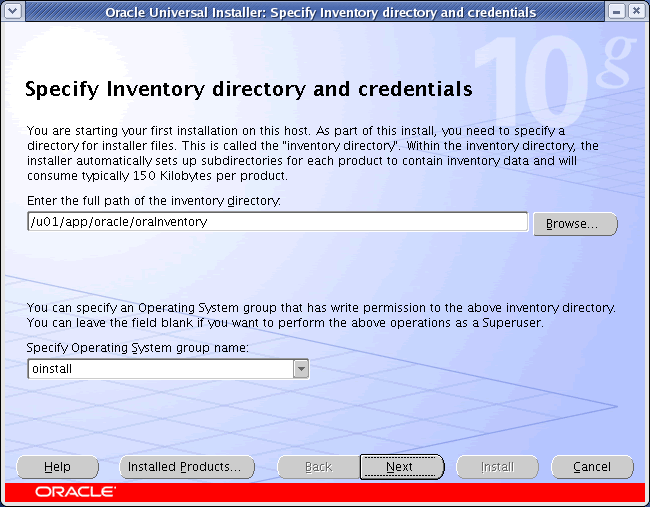
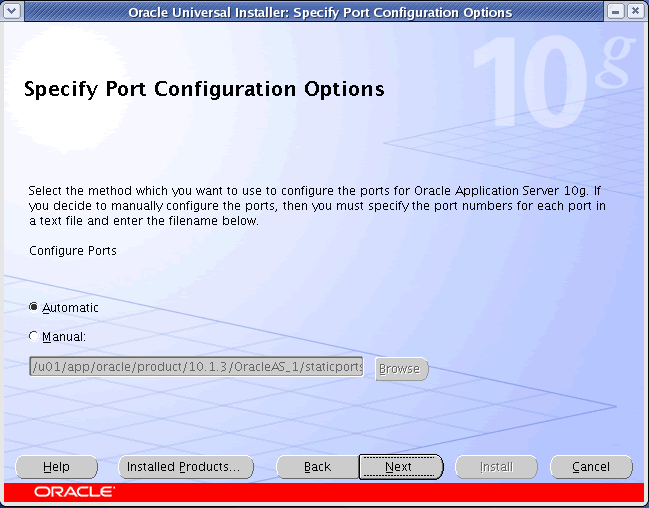
For a more detailed look at the installation process, click on the links below to see screen shots of each stage.
- Installation
- Installation Warning
- Specify Inventory Directory and Credentials
- Specify Inventory Directory and Credentials Dialog
- Select Installation Type
- Product-Specific Prerequisite Checks
- Specify Port Configuration Options
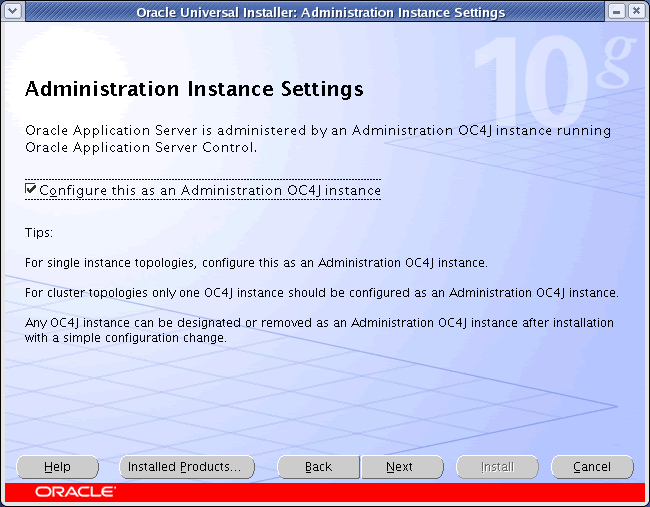
- Administration Instance Settings
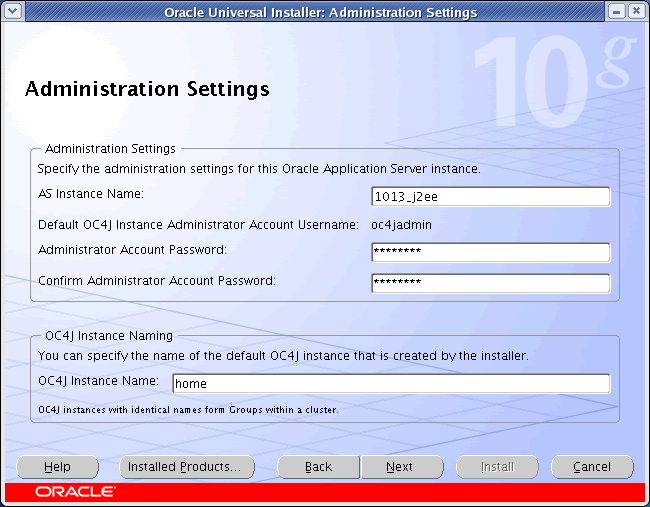
- Administration Settings
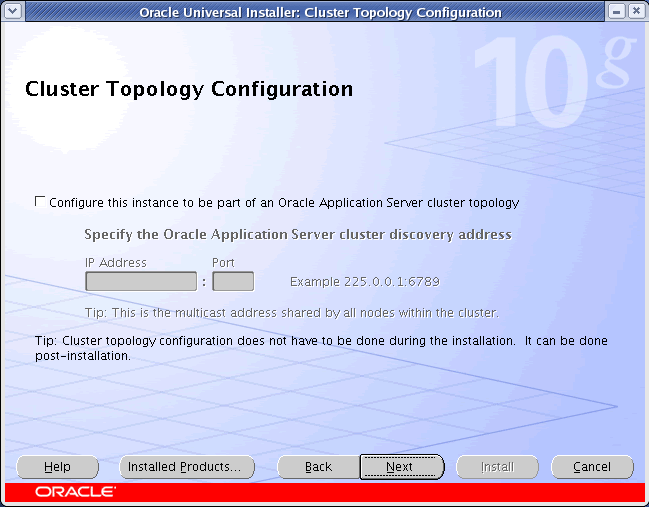
- Cluster Topology Configuration
- Summary
- Install
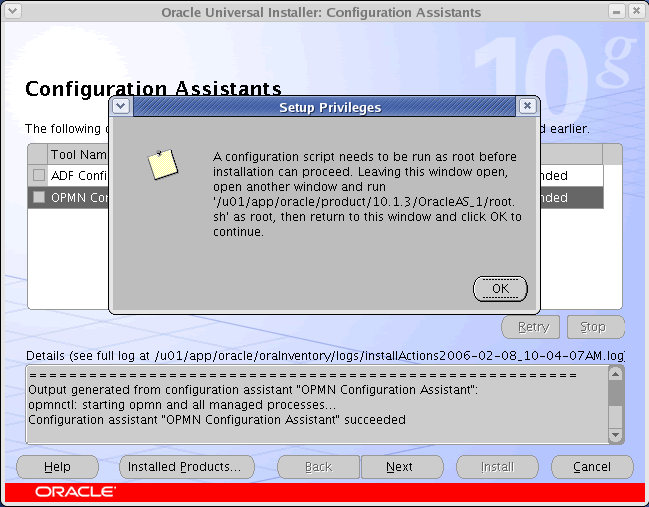
- Configuration Assistants
- Setup Privileges
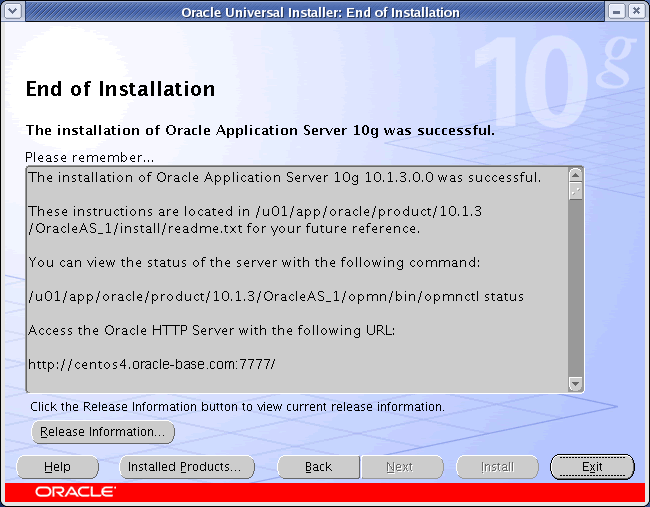
- End of Installation
Post Installation
Edit the "/etc/redhat-release" file restoring the original release information.
Fedora Core release 5 (Bordeaux)
With the installation complete you can perform any administration tasks using the Enterprise Manager Website (http://<fully-qualified-machine-name>:7777/em). Log in using the username "oc4jadmin" and the password you assigned during the installation.
For more information see:
Hope this helps. Regards Tim...