8i | 9i | 10g | 11g | 12c | 13c | 18c | 19c | 21c | 23c | Misc | PL/SQL | SQL | RAC | WebLogic | Linux
Home » Articles » Linux » Here
OCFS2 On Linux
The Oracle Cluster File System (OCFS2) is an open source general-purpose file system that allows files to be shared between nodes of a cluster, including RAC. Although OCFS2 can be used to share datafiles between RAC nodes, the current recommendation is to avoid this and use ASM to control the shared disks directly as raw devices, or via the ASMLib software. Even so, OCFS2 has some uses in a RAC environment, like providing a shared location for UTL_FILE and external table operations for the whole RAC. The following article illustrates the installation and basic configuration of OCFS2.
Perform all of the following operations on all nodes in the cluster, unless instructed otherwise.
Create a mount point for the cluster file system.
# mkdir /u02
Check the kernel version using the "uname -r" command.
# uname -r
2.6.9-22.EL
#
Download the appropriate version of the OCFS2 kernel module and tools from the following locations:
Install the software.
# rpm -Uvh ocfs2-2.6.9-22.EL-1.2.1-1.i686.rpm \
           ocfs2console-1.2.1-1.i386.rpm \
           ocfs2-tools-1.2.1-1.i386.rpm \
           ocfs2-tools-debuginfo-1.2.1-1.i386.rpm
Preparing...                ########################################### [100%]
   1:ocfs2-tools            ########################################### [ 25%]
   2:ocfs2-2.6.9-22.EL      ########################################### [ 50%]
   3:ocfs2console           ########################################### [ 75%]
   4:ocfs2-tools-debuginfo  ########################################### [100%]
#
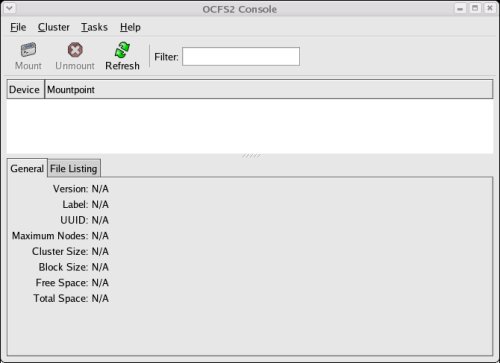
Start the OCFS2 Console by issuing the following command as the root user.
# ocfs2console
The image below shows the console window.
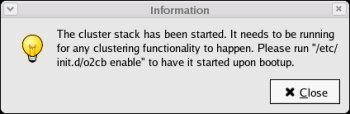
Select the "Cluster > Configure Nodes..." menu option and ignore the subsequent information message by clicking the "Close" button.
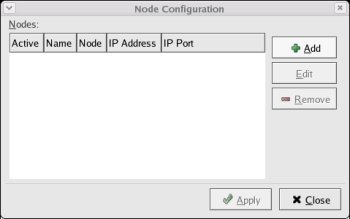
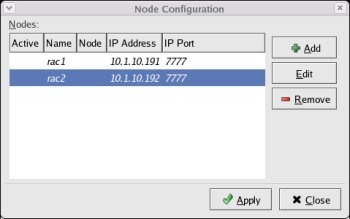
On the "Node Configuration" screen, click the "+ Add" button.
Enter the server name and IP address for the first node, then click the "OK" button.
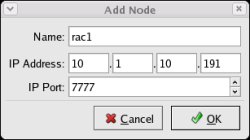
Add the second node, then click the "Apply" button followed by the "Close" button on the "Node Configuration" screen.
Edit the "/etc/init.d/o2cb" script, removing the following entries.
### BEGIN INIT INFO
## Provides: o2cb
## Required-Start: $network
## Should-Start:
## Required-Stop:
## Default-Start: 2 3 5
## Default-Stop:
## Description: Load O2CB cluster services at system boot.
### END INIT INFO
Reregister the o2cb service using the following commands.
# chkconfig --del o2cb
# chkconfig --add o2cb
# chkconfig --list o2cb
o2cb            0:off   1:off   2:on    3:on    4:on    5:on    6:off
#
Configure the o2cb service using the following commands.
# /etc/init.d/o2cb offline ocfs2
Cleaning heartbeat on ocfs2: OK
Stopping cluster ocfs2: OK
#
# /etc/init.d/o2cb unload
Unmounting ocfs2_dlmfs filesystem: OK
Unloading module "ocfs2_dlmfs": OK
Unmounting configfs filesystem: OK
Unloading module "configfs": OK
#
# /etc/init.d/o2cb configure
Configuring the O2CB driver.

This will configure the on-boot properties of the O2CB driver.
The following questions will determine whether the driver is loaded on
boot.  The current values will be shown in brackets ('[]').  Hitting
<ENTER> without typing an answer will keep that current value.  Ctrl-C
will abort.

Load O2CB driver on boot (y/n) [y]:
Cluster to start on boot (Enter "none" to clear) [ocfs2]:
Writing O2CB configuration: OK
Loading module "configfs": OK
Mounting configfs filesystem at /config: OK
Loading module "ocfs2_nodemanager": OK
Loading module "ocfs2_dlm": OK
Loading module "ocfs2_dlmfs": OK
Mounting ocfs2_dlmfs filesystem at /dlm: OK
Starting cluster ocfs2: OK
Other available commands include:
- "
/etc/init.d/o2cb load" - Loads all OCFS2 modules. - "
/etc/init.d/o2cb online" - Brings the cluster online. - "
/etc/init.d/o2cb offline" - Takes the cluster offline. - "
/etc/init.d/o2cb unload" - Unloads all OCFS2 modules.
Partition the shared disk(s) on a single node. The following example shows how the "fdisk" command is used to partition the "/dev/sdb" disk.
# cd /dev
# ls sd*
sda  sda1  sda2  sdb
# fdisk /dev/sdb
Device contains neither a valid DOS partition table, nor Sun, SGI or OSF disklabel
Building a new DOS disklabel. Changes will remain in memory only,
until you decide to write them. After that, of course, the previous
content won't be recoverable.


The number of cylinders for this disk is set to 1305.
There is nothing wrong with that, but this is larger than 1024,
and could in certain setups cause problems with:
1) software that runs at boot time (e.g., old versions of LILO)
2) booting and partitioning software from other OSs
   (e.g., DOS FDISK, OS/2 FDISK)
Warning: invalid flag 0x0000 of partition table 4 will be corrected by w(rite)

Command (m for help): n
Command action
   e   extended
   p   primary partition (1-4)
p
Partition number (1-4): 1
First cylinder (1-1305, default 1):
Using default value 1
Last cylinder or +size or +sizeM or +sizeK (1-1305, default 1305):
Using default value 1305

Command (m for help): p

Disk /dev/sdb: 10.7 GB, 10737418240 bytes
255 heads, 63 sectors/track, 1305 cylinders
Units = cylinders of 16065 * 512 = 8225280 bytes

   Device Boot      Start         End      Blocks   Id  System
/dev/sdb1               1        1305    10482381   83  Linux

Command (m for help): w
The partition table has been altered!

Calling ioctl() to re-read partition table.
Syncing disks.
#
On the other nodes, start the "fdisk" command and pick the "w" option to make sure the node knows the parition exists.
Start the OCFS2 Console on the first node, using the following command.
# ocfs2console
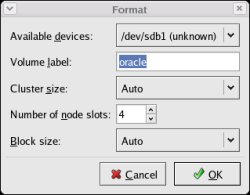
On the Console screen, select the "Tasks > Format" menu option. Select the appropriate partiton and click the "OK" button and confirm the operation by clicking the "Yes" button on the subsequent screen.
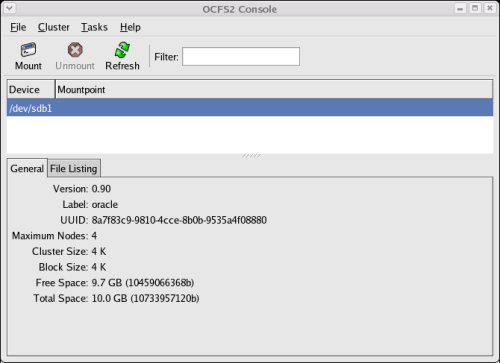
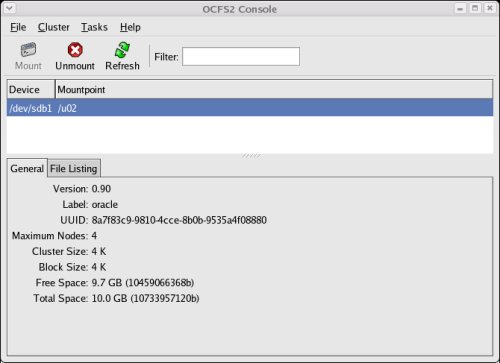
The partition is displayed on the console screen once the format operation is complete.
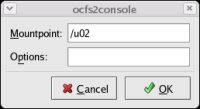
Make sure the partition is highlighted, then click the mount button on the toolbar. Enter the "/u02" mount point and any additional options, then click the "OK" button.
The partition is now listed along with its mount point in the console screen.
Only the mount operation is necessary on all other nodes, not the format operation.
To automount the filesystem, append the following entry to the "/etc/fstab" file on each node.
/dev/sdb1 /u02 ocfs2 _netdev,datavolume 0 0
The filesystem should now be available from both nodes.
For more information see:
- OCFS2
- ASM using ASMLib and Raw Devices
- Oracle Database 10g Release 2 (10.2.0.1) RAC Installation On Linux (CentOS 4) Using VMware Server
Hope this helps. Regards Tim...