8i | 9i | 10g | 11g | 12c | 13c | 18c | 19c | 21c | 23ai | Misc | PL/SQL | SQL | RAC | WebLogic | Linux
Oracle Database 11g Release 2 RAC On Windows 2008 Using VirtualBox
This article describes the installation of Oracle Database 11g Release 2 (11.2.0.2.0) RAC on Windows 2008 Server Standard Edition using VirtualBox with no additional shared disk devices.
- Introduction
- Download Software
- VirtualBox Installation
- Virtual Machine Setup
- Guest Operating System Installation
- Oracle Installation Prerequisites
- Create Shared Disks
- Clone the Virtual Machine
- Install the Grid Infrastructure
- Install the Database Software and Create a Database
- Check the Status of the RAC
Related articles.
- Oracle Database 11g Release 2 RAC On Oracle Linux 5.8 Using VirtualBox
- Oracle Database 11g Release 2 (11.2.0.3.0) RAC On Oracle Linux 6.3 Using VirtualBox
Introduction
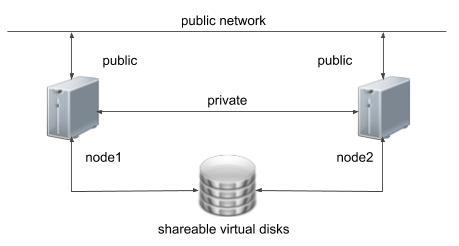
One of the biggest obstacles preventing people from setting up test RAC environments is the requirement for shared storage. In a production environment, shared storage is often provided by a SAN or high-end NAS device, but both of these options are very expensive when all you want to do is get some experience installing and using RAC. A cheaper alternative is to use a FireWire disk enclosure to allow two machines to access the same disk(s), but that still costs money and requires two servers. A third option is to use virtualization to fake the shared storage.
Using VirtualBox you can run multiple Virtual Machines (VMs) on a single server, allowing you to run both RAC nodes on a single machine. In additon, it allows you to set up shared virtual disks, overcoming the obstacle of expensive shared storage.
Before you launch into this installation, here are a few things to consider.
- The finished system includes the host operating system, two guest operating systems, two sets of Oracle Grid Infrastructure (Clusterware + ASM) and two Database instances all on a single server. As you can imagine, this requires a significant amount of disk space, CPU and memory.
- Following on from the last point, the VMs will each need at least 3G of RAM, preferably 4G if you don't want the VMs to swap like crazy. As you can see, 11gR2 RAC requires much more memory than 11gR1 RAC. Don't assume you will be able to run this on a small PC or laptop. You won't.
- This procedure provides a bare bones installation to get the RAC working. There is no redundancy in the Grid Infrastructure installation or the ASM installation. To add this, simply create double the amount of shared disks and select the "Normal" redundancy option when it is offered. Of course, this will take more disk space.
- During the virtual disk creation, I always choose not to preallocate the disk space. This makes virtual disk access slower during the installation, but saves on wasted disk space. The shared disks must have their space preallocated.
- This is not, and should not be considered, a production-ready system. It's simply to allow you to get used to installing and using RAC.
- The Single Client Access Name (SCAN) should really be defined in the DNS or GNS and round-robin between one of 3 addresses, which are on the same subnet as the public and virtual IPs. In previous Linux installations I've defined it as a single IP address in the "/etc/hosts" file, which is wrong and will cause the cluster verification to fail, but it allows me to complete the install without the presence of a DNS.
- The virtual machines can be limited to 2Gig of swap, which causes a prerequisite check failure, but doesn't prevent the installation working. If you want to avoid this, define 3+Gig of swap.
- This article uses the 64-bit versions of Windows and Oracle 11g Release 2.
Download Software
Download the following software.
VirtualBox Installation
First, install the VirtualBox software. On RHEL and its clones you do this with the following command as the root user.
# rpm -Uvh VirtualBox-4.1-4.1.2_73507_fedora15-1.x86_64.rpm
Once complete, VirtualBox is started from the "Applications > System Tools > Oracle VM VirtualBox" menu option.
Virtual Machine Setup
Now we must define the two virtual RAC nodes. We can save time by defining one VM, then cloning it when it is installed.
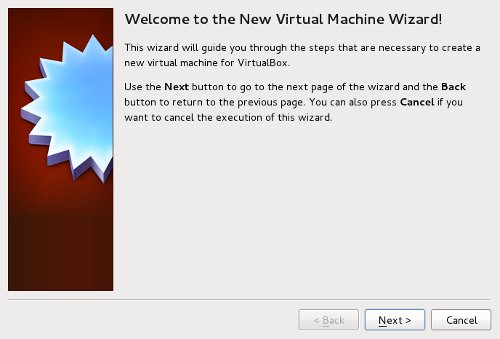
Start VirtualBox and click the "New" button on the toolbar. Click the "Next" button on the first page of the Virtual Machine Wizard.
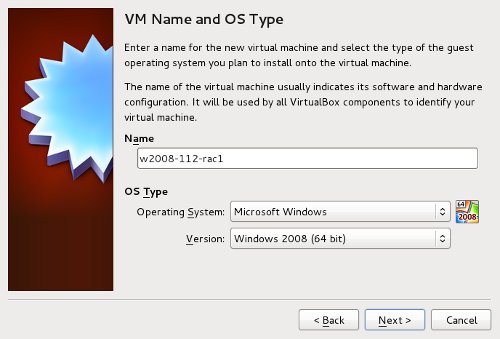
Enter the name "w2008-112-rac1", OS "Microsoft Windows" and Version "Windows 2008 (64 bit)", then click the "Next" button.
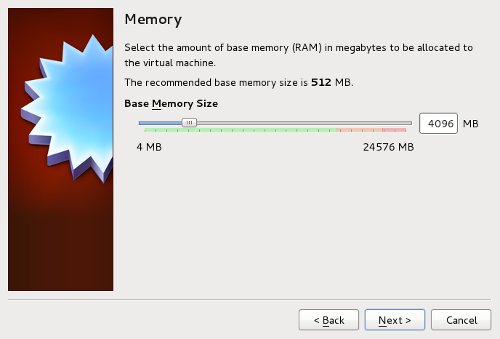
Enter "4096" as the base memory size, then click the "Next" button.
Accept the default option to create a new virtual hard disk by clicking the "Next" button.

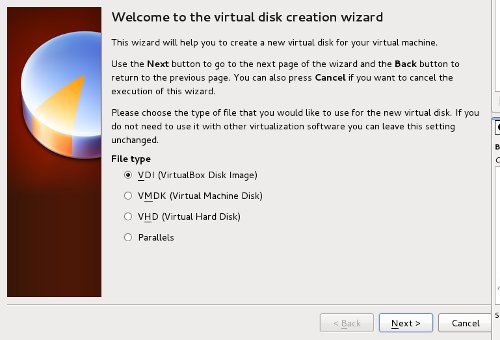
Select the desired file type, then click the "Next" button.
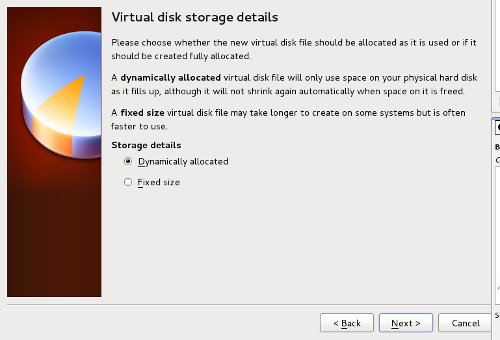
Acccept the default option by clicking the "Next" button.
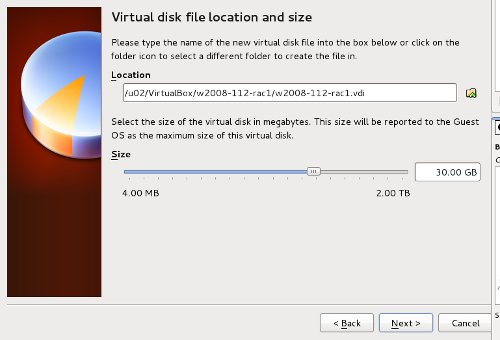
Accept the default location, or enter an alterative, set the size to "30G" and click the "Next" button.
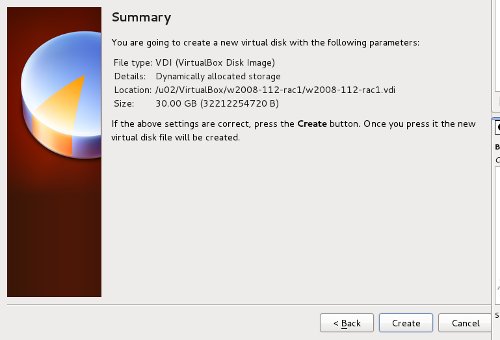
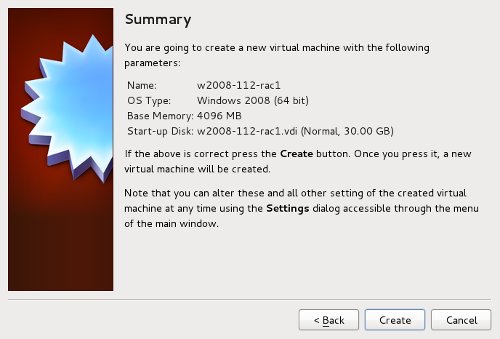
Click the "Create" button on the Virtual Disk Wizard Summary screen.
Click the "Create" button on the Virtual Machine Wizard Summary screen.
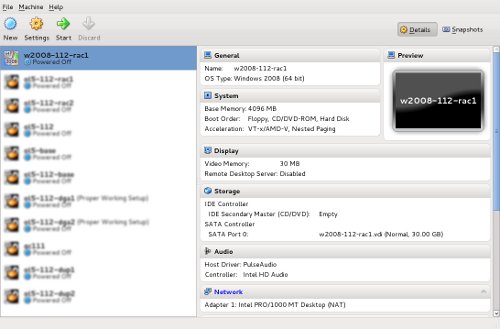
The "w2008-112-rac1" VM will appear on the left hand pane. Scroll down the "Details" tab on the right and click on the "Network" link.
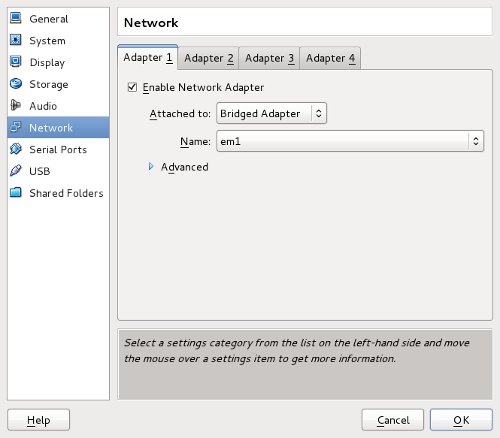
Make sure "Adapter 1" is enabled, set to "Bridged Adapter" and select your physical network adapter "em1", then click on the "Adapter 2" tab.
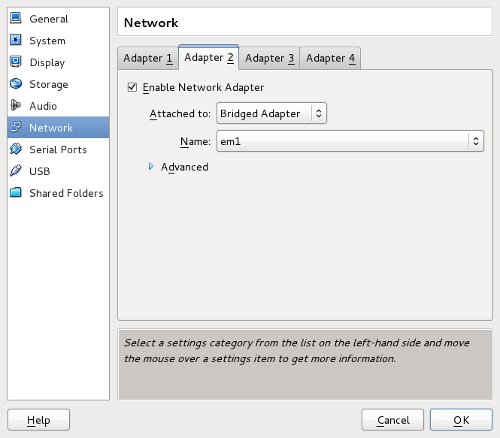
Make sure "Adapter 2" is enabled, set to "Bridged Adapter" and select your physical network adapter "em1", then click on the "OK" button.
The virtual machine is now configured so we can start the guest operating system installation.
Guest Operating System Installation
Place the Windows 2008 SE disk in the CD drive and start the virtual machine by clicking the start button on the toolbar. The resulting console window will contain the Windows boot screen.
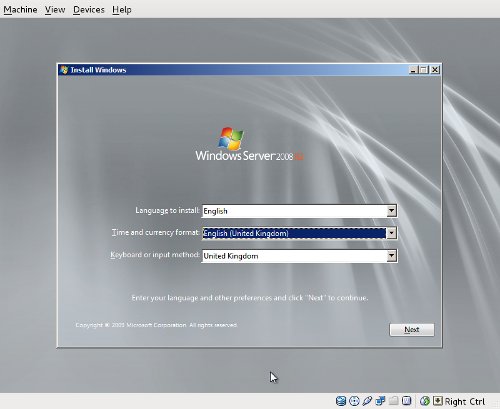
Continue through the Full Standard Edition installation as you would for a normal server.
When the installation is complete, remember to install the VirtualBox Guest Additions on the server. This is initiated from the "Devices > Install Guest Additions..." menu. Accept all the defaults and reboot the server when requested.
Oracle Installation Prerequisites
Turn off the Windows firewall "Start > Control Panel > System and Security (Check Firewall Status) > Turn Windows Firewall on or off" to prevent it from interferring with the sever communication. You can turn it on later and open up any required ports if you want to.
Perform the following steps whilst logged into the virtual machine.
Amend the "C:\windows\system32\drivers\etc\hosts" file to contain the following information. Note. If you will be using DNS to resolve the SCAN, comment out the entries for it in the "hosts" files.
127.0.0.1       localhost.localdomain   localhost
# Public
192.168.0.151   w2008-112-rac1.localdomain        w2008-112-rac1
192.168.0.152   w2008-112-rac2.localdomain        w2008-112-rac2
#Private
192.168.1.151   w2008-112-rac1-priv.localdomain   w2008-112-rac1-priv
192.168.1.152   w2008-112-rac2-priv.localdomain   w2008-112-rac2-priv
#Virtual
192.168.0.153   w2008-112-rac1-vip.localdomain    w2008-112-rac1-vip
192.168.0.154   w2008-112-rac2-vip.localdomain    w2008-112-rac2-vip
#SCAN (192.168.0.155 - 192.168.0.157 in DNS)
192.168.0.155   w2008-112-scan.localdomain w2008-112-scan
192.168.0.156   w2008-112-scan.localdomain w2008-112-scan
192.168.0.157   w2008-112-scan.localdomain w2008-112-scan
Open the "Network Connections" screen (Start > Control Panel > Network and Internet > Network and Sharing Center > Change adapter settings). Rename the two connections to "public" and "private" respectively, making sure you apply the names to the appropriate connections. You can do this by right-clicking on the connection and selecting "Rename" from the pop-up menu.
Set the correct IP information for the two connections. Right-click on a connection and select the "Properties" menu option. Click on "Internet Protocol Version 4 (TCP/IPv4)" option and click the "Properties. button. Enter the appropriate IP, subnet, default gateway and DNS for the networks.
public:
- IP Address: 192.168.0.151
- Subnet: 255.255.255.0
- Default Gateway: 192.168.0.1
- DNS: 192.168.0.4
private:
- IP Address: 192.168.1.151
- Subnet: 255.255.255.0
- Default Gateway: N/A
- DNS: N/A
If any of the network connections are left in a disabled state, right-click on then and select the "Diagnose" option to repair them.
Ensure the public interface is first in the bind order:
- On the "Network Connections" dialog, press "Alt+N" to show the advanced menu. Select "Advanced Settings...".
- On the "Adapters and Bindings" tab, make sure the public interface is the first interface listed.
- Click on each network in turn and make sure the "TCP/IPv4" bindings come before the "TCP/IPv6" bindings. This should be correct by default.
- Accept any modifications by clicking on the "OK" button and exiting the "Network Connections" dialog.
Disable Windows Media Sensing for TCP/IP:
- Backup the Windows registry.
Run the Registry Editor (Regedit.exe) and find the following key.
HKEY_LOCAL_MACHINE\SYSTEM\CurrentControlSet\Services\Tcpip\Parameters
Add the following registry value.
Value Name: DisableDHCPMediaSense
Data Type: DWORD
Value: 1
- This change will not take effect until the computer is restarted.
Open the "System Properties" dialog (Start > Control Panel > System and Security > System > Change Settings) and do the following:
- Click the "Change" button, enter the machine name "w2008-112-rac1" then click the "OK" button.
- Click on the Advanced tab and the "Environment Variables" button.
- Edit both the "TEMP" and "TMP" environment variables to be "%WINDIR%\temp", which is "C:\Windows\temp".
- Click the "OK" button and "OK" out of the "System" dialog.
In this installation I will install Oracle as the Administrator user. If you want to set up another user, it must be part of the administrator group and have the "TMP" and "TEMP" environment variables set correctly.
Create Shared Disks
Make sure the VM is shutdown, create a directory to host the shared virtual disks on the host OS, then create the shared disks. My host is Linux, so the paths to the virtual disks are UNIX-style paths. If your host is Windows, then you will be using Windows-style paths.
$ mkdir -p /u04/VirtualBox/w2008-112-rac
$ cd /u04/VirtualBox/w2008-112-rac
$
$ # Create the disks and associate them with VirtualBox as virtual media.
$ VBoxManage createhd --filename asm1.vdi --size 5120 --format VDI --variant Fixed
$ VBoxManage createhd --filename asm2.vdi --size 5120 --format VDI --variant Fixed
$ VBoxManage createhd --filename asm3.vdi --size 5120 --format VDI --variant Fixed
$ VBoxManage createhd --filename asm4.vdi --size 5120 --format VDI --variant Fixed
$ VBoxManage createhd --filename asm5.vdi --size 5120 --format VDI --variant Fixed
$
$ # Connect them to the VM.
$ VBoxManage storageattach w2008-112-rac1 --storagectl "SATA Controller" --port 1 --device 0 --type hdd --medium asm1.vdi --mtype shareable
$ VBoxManage storageattach w2008-112-rac1 --storagectl "SATA Controller" --port 2 --device 0 --type hdd --medium asm2.vdi --mtype shareable
$ VBoxManage storageattach w2008-112-rac1 --storagectl "SATA Controller" --port 3 --device 0 --type hdd --medium asm3.vdi --mtype shareable
$ VBoxManage storageattach w2008-112-rac1 --storagectl "SATA Controller" --port 4 --device 0 --type hdd --medium asm4.vdi --mtype shareable
$ VBoxManage storageattach w2008-112-rac1 --storagectl "SATA Controller" --port 5 --device 0 --type hdd --medium asm5.vdi --mtype shareable
$
$ # Make shareable.
$ VBoxManage modifyhd asm1.vdi --type shareable
$ VBoxManage modifyhd asm2.vdi --type shareable
$ VBoxManage modifyhd asm3.vdi --type shareable
$ VBoxManage modifyhd asm4.vdi --type shareable
$ VBoxManage modifyhd asm5.vdi --type shareable
Start the w2008-112-rac1 virtual machine by clicking the "Start" button on the toolbar. When the server has started, log in so you can partition the disks.
We will partition the disks using the "DiskPart" utility. To get alist of the current disks do the following.
C:\>diskpart

Microsoft DiskPart version 6.0.6001
Copyright (C) 1999-2007 Microsoft Corporation.
On computer: RAC1

DISKPART> list disk

  Disk ###  Status      Size     Free     Dyn  Gpt
  --------  ----------  -------  -------  ---  ---
  Disk 0    Online        24 GB      0 B
  Disk 1    Online        10 GB    10 GB
  Disk 2    Online        10 GB    10 GB
  Disk 3    Online        10 GB    10 GB
  Disk 4    Online        10 GB    10 GB
  Disk 5    Online        10 GB    10 GB

DISKPART>
In the diskpart utility we will perform the following commands.
automount enable
select disk 1
create partition extended
create partition logical
select disk 2
create partition extended
create partition logical
select disk 3
create partition extended
create partition logical
select disk 4
create partition extended
create partition logical
select disk 5
create partition extended
create partition logical
exit
Stamp the disks for use with ASM. This is done using the asmtool that comes with the Grid Infrastructure media.
C:> Z:
Z:> cd z:\software\oracle\11gR2\11.2.0.2.0\win64_grid\asmtool
Z:> asmtool -add \Device\HardDisk1\Partition1 ORCLDISK1
Z:> asmtool -add \Device\HardDisk2\Partition1 ORCLDISK2
Z:> asmtool -add \Device\HardDisk3\Partition1 ORCLDISK3
Z:> asmtool -add \Device\HardDisk4\Partition1 ORCLDISK4
Z:> asmtool -add \Device\HardDisk5\Partition1 ORCLDISK5

Z:> asmtool -list

NTFS                             \Device\Harddisk0\Partition1              100M
NTFS                             \Device\Harddisk0\Partition2            30618M
ORCLDISK1                        \Device\Harddisk1\Partition1             5117M
ORCLDISK2                        \Device\Harddisk2\Partition1             5117M
ORCLDISK3                        \Device\Harddisk3\Partition1             5117M
ORCLDISK4                        \Device\Harddisk4\Partition1             5117M
ORCLDISK5                        \Device\Harddisk5\Partition1             5117M

Z:>
The shared disks are now configured.
Clone the Virtual Machine
Later versions of VirtualBox allow you to clone VMs, but these also attempt to clone the shared disks, which is not what we want. Instead we must manually clone the VM.
Shutdown the "w2008-112-rac1" VM.
Manually clone the virtual disk using the following commands on the host server.
$ mkdir -p /u03/VirtualBox/w2008-112-rac2
$ VBoxManage clonehd /u02/VirtualBox/w2008-112-rac1/w2008-112-rac1.vdi /u03/VirtualBox/w2008-112-rac2/w2008-112-rac2.vdi
Create the "w2008-112-rac2" virtual machine in VirtualBox in the same way as you did for "w2008-112-rac1", with the exception of using an existing "w2008-112-rac2.vdi" virtual hard drive.
Remember to add the second network adaptor as you did on the first VM. When the VM is created, attach the shared disks to this VM.
$ cd /u04/VirtualBox/w2008-112-rac
$
$ VBoxManage storageattach w2008-112-rac2 --storagectl "SATA Controller" --port 1 --device 0 --type hdd --medium asm1.vdi --mtype shareable
$ VBoxManage storageattach w2008-112-rac2 --storagectl "SATA Controller" --port 2 --device 0 --type hdd --medium asm2.vdi --mtype shareable
$ VBoxManage storageattach w2008-112-rac2 --storagectl "SATA Controller" --port 3 --device 0 --type hdd --medium asm3.vdi --mtype shareable
$ VBoxManage storageattach w2008-112-rac2 --storagectl "SATA Controller" --port 4 --device 0 --type hdd --medium asm4.vdi --mtype shareable
$ VBoxManage storageattach w2008-112-rac2 --storagectl "SATA Controller" --port 5 --device 0 --type hdd --medium asm5.vdi --mtype shareable
Start the "w2008-112-rac2" virtual machine.
Open the "Network Connections" screen (Start > Control Panel > Network and Internet > Network and Sharing Center > Change adapter settings) and amend the IP address values of each network to the appropriate values for the second node.
Open the "System Properties" dialog (Start > Control Panel > System and Security > System > Change Settings) and change the machine name by clicking the "Change" button. Click all "OK" buttons to exit the "System Properties" dialog and restart the server when prompted.
Once the RAC2 virtual machine has restarted, start the RAC1 virtual machine. When both nodes have started, check they can both ping all the public and private IP addresses using the following commands.
ping rac1
ping rac1-priv
ping rac2
ping rac2-priv
At this point the virtual IP addresses defined in the hosts file will not work, so don't bother testing them.
The virtual machine setup is now complete.
Install the Grid Instrastructure
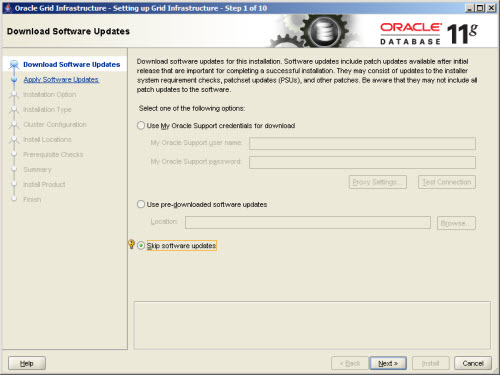
Start the installer by double-clicking on the "Setup.exe" in the root of the installation media.
Check the "Skip software updates" option, then click the "Next" button.
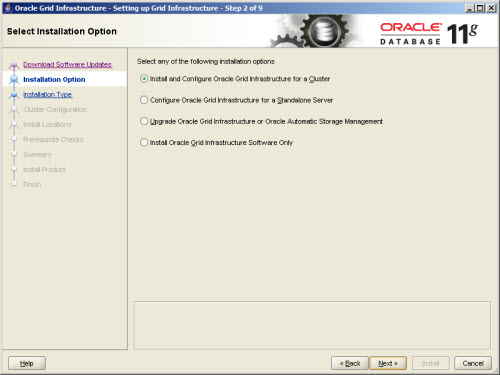
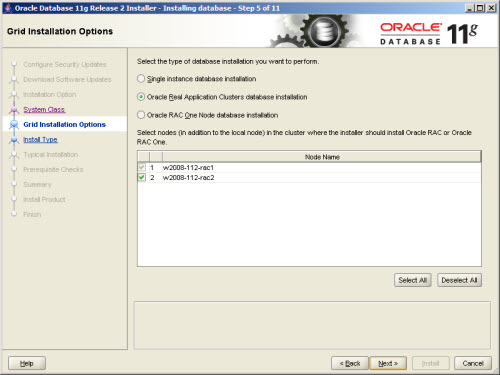
Select the "Install and Configure Grid Infrastructure for a Cluster" option, then click the "Next" button.
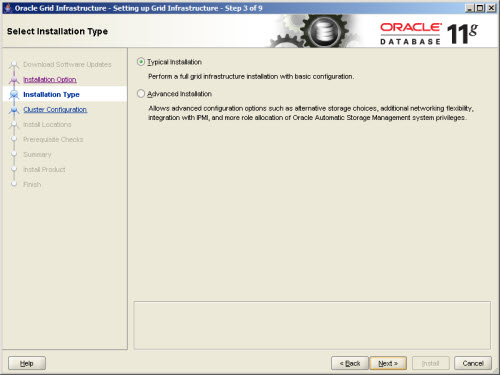
Select the "Typical Installation" option, then click the "Next" button.
On the "Specify Cluster Configuration" screen, click the "Add" button.
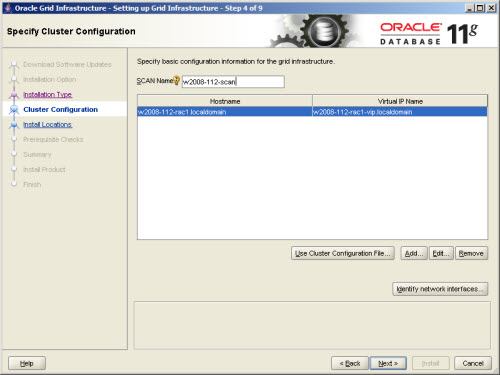
Enter the details of the second node in the cluster, then click the "OK" button.
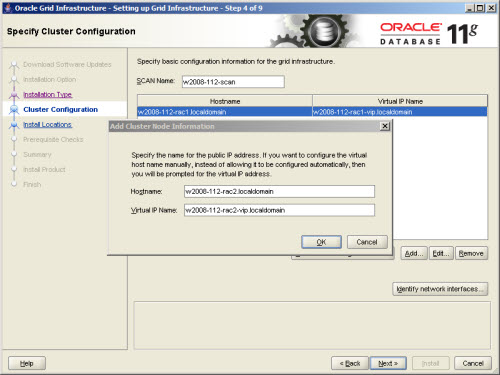
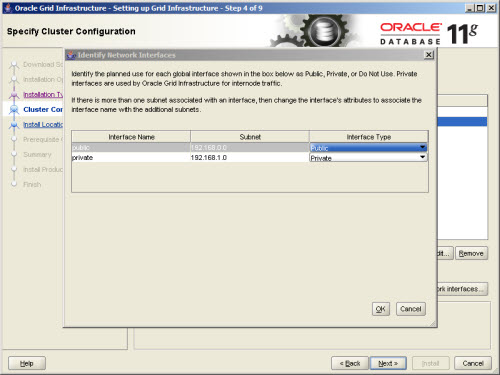
Click the "Identify network interfaces..." button and check the public and private networks are specified correctly. Once you are happy with them, click the "OK" button and the "Next" button on the previous screen.
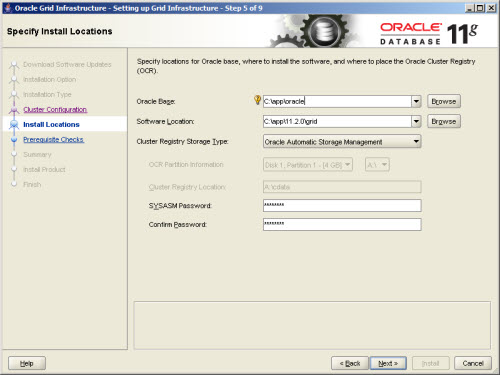
Enter appropriate paths and "Automatic Storage Manager" as the cluster registry storage type. Enter the ASM password and click the "Next" button.
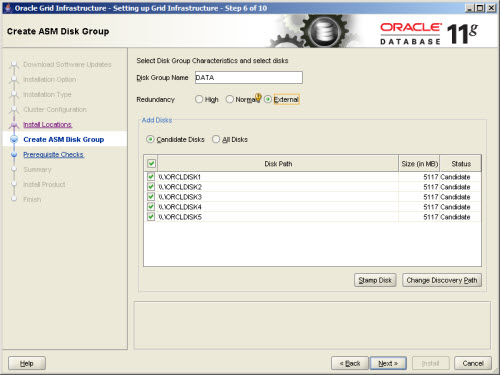
Set the redundancy to "External", select all 5 disks and click the "Next" button.
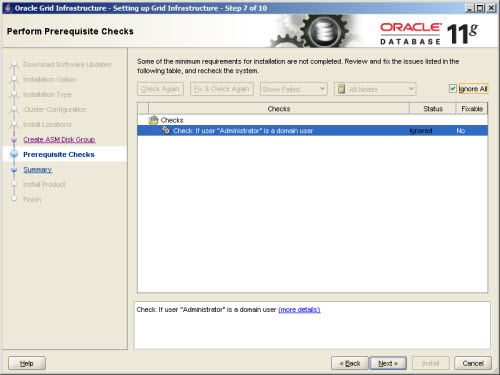
Wait while the prerequisite checks complete. If you have any issues, either fix them or check the "Ignore All" checkbox and click the "Next" button. In this installation I used the local "Administrator" user, rather than a domain user, hence the failure. The installation completes successfully despite this.
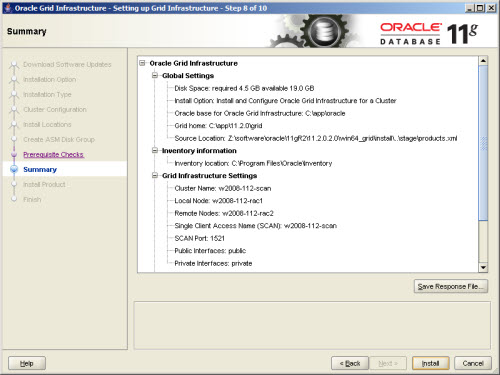
If you are happy with the summary information, click the "Install" button.
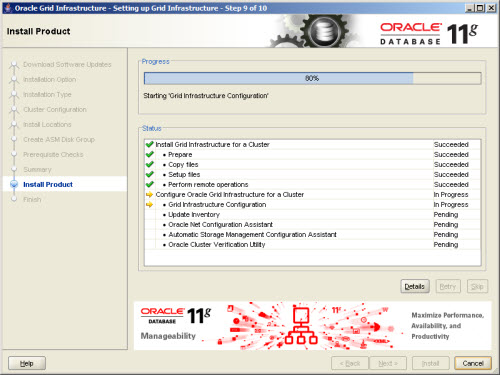
Wait while the setup takes place.
Click the "Close" button to exit the installer.

The clusterware installation is now complete.
Install the Database Software and Create a Database
Start the installer by double-clicking on the "Setup.exe" in the root of the installation media.
Uncheck the security updates checkbox and click the "Next" button.

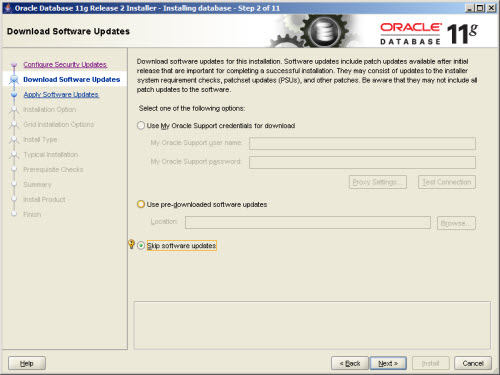
Check the "Skip software updates" checkbox and click the "Next" button.
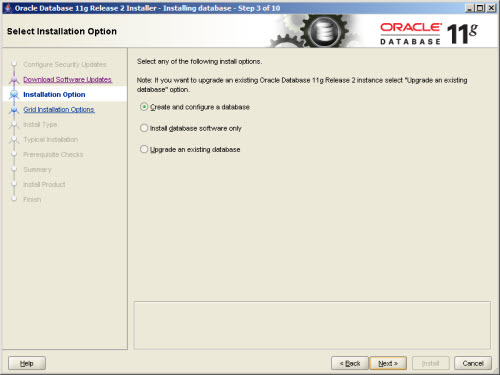
Accept the "Create and configure a database" option by clicking the "Next" button.
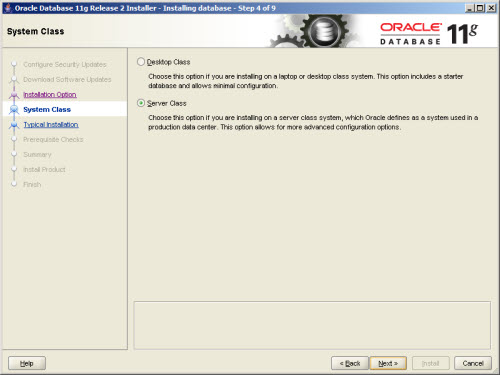
Accept the "Server Class" option by clicking the "Next" button.
Make sure both nodes are selected, then click the "Next" button.
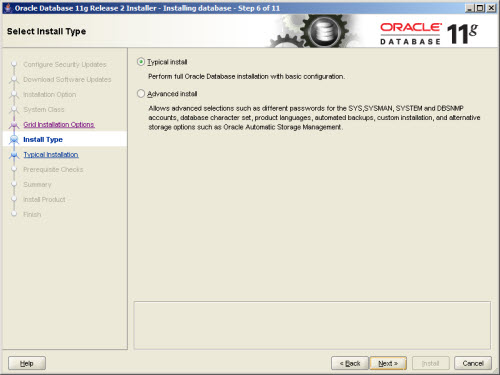
Accept the "Typical install" option by clicking the "Next" button.
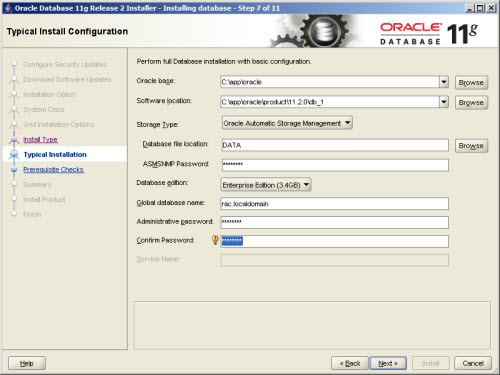
Enter appropriate paths. The storage type should be set to "Automatic Storage Manager". Enter the appropriate passwords and database name, in this case "rac.localdomain".
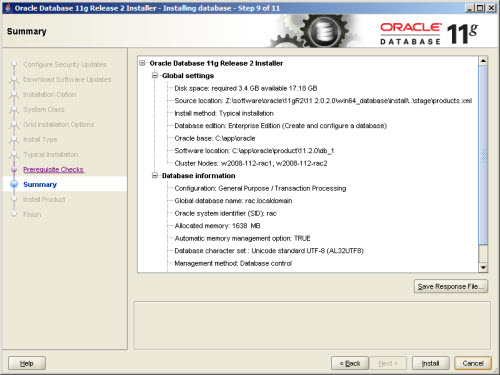
Wait for the prerequisite check to complete. If there are any problems either fix them, or check the "Ignore All" checkbox and click the "Next" button. If there are no errors, you will move directly to the summary screen. If you are happy with the summary information, click the "Install" button.
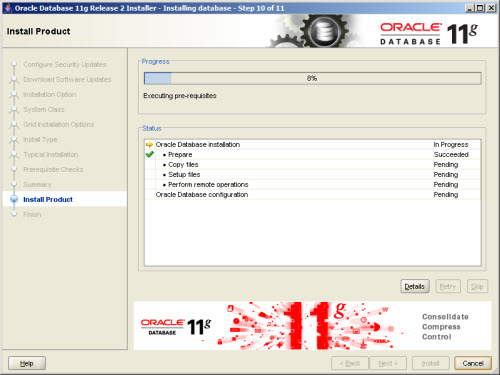
Wait while the installation takes place.
Perform any suggested tasks on the "Finish" screen. Click the "Close" button to exit the installer.

The RAC database creation is now complete.
Check the Status of the RAC
There are several ways to check the status of the RAC. The srvctl utility shows the current configuration and status of the RAC database.
C:\>srvctl config database -d RAC
Database unique name: rac
Database name: rac
Oracle home: C:\app\oracle\product\11.2.0\db_1
Oracle user: nt authority\system
Spfile: +DATA/rac/spfilerac.ora
Domain: localdomain
Start options: open
Stop options: immediate
Database role: PRIMARY
Management policy: AUTOMATIC
Server pools: rac
Database instances: rac1,rac2
Disk Groups: DATA
Mount point paths:
Services:
Type: RAC
Database is administrator managed

C:\>

C:\>srvctl status database -d RAC
Instance rac1 is running on node w2008-112-rac1
Instance rac2 is running on node w2008-112-rac2

C:\>
The V$ACTIVE_INSTANCES view can also display the current status of the instances.
C:\>sqlplus / as sysdba

SQL*Plus: Release 11.2.0.2.0 Production on Tue Sep 13 12:58:23 2011

Copyright (c) 1982, 2010, Oracle.  All rights reserved.


Connected to:
Oracle Database 11g Enterprise Edition Release 11.2.0.2.0 - 64bit Production
With the Partitioning, Real Application Clusters, Automatic Storage Management,
OLAP,
Data Mining and Real Application Testing options

SQL> SELECT inst_name FROM v$active_instances;

INST_NAME
--------------------------------------------------------------------------------

W2008-112-RAC1:rac1
W2008-112-RAC2:rac2

SQL>
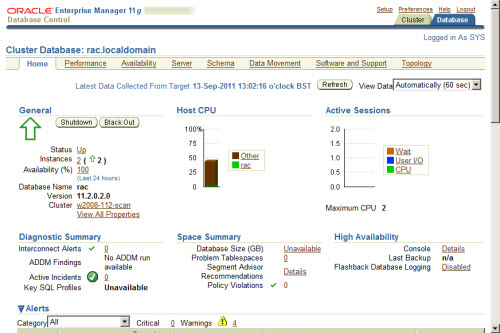
If you have configured Enterprise Manager, it can be used to view the configuration and current status of the database using a URL like "https://w2008-112-rac1.localdomain:1158/em".
For more information see:
- Oracle Grid Infrastructure Installation Guide 11g Release 2 (11.2) for Microsoft Windows x64 (64-Bit)
- Oracle Real Application Clusters Installation Guide 11g Release 2 (11.2) for Microsoft Windows x64 (64-Bit)
- Oracle Database 11g Release 2 RAC On Oracle Linux 5.8 Using VirtualBox
- Oracle Database 11g Release 2 (11.2.0.3.0) RAC On Oracle Linux 6.3 Using VirtualBox
Hope this helps. Regards Tim...