8i | 9i | 10g | 11g | 12c | 13c | 18c | 19c | 21c | 23ai | Misc | PL/SQL | SQL | RAC | WebLogic | Linux
Oracle VM (2.2) Installation
This article gives a brief overview of the installation of Oracle VM Server and Oracle VM Manager version 2.2 (64-bit).
Oracle VM Software
The Oracle VM software can be downloaded from the Oracle E-Delivery Web site for Oracle Linux and Oracle VM.
Oracle VM Server
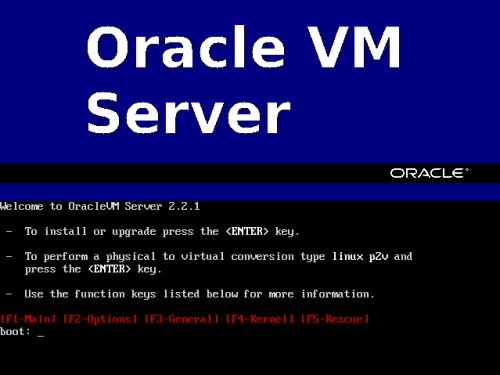
The Oracle VM Server software is a bare-metal installation, which means it is installed directly on to the server with no initial OS installation. After placing the CD into the drive and starting the server you are presented with the boot screen. Press the "Return" key to continue.
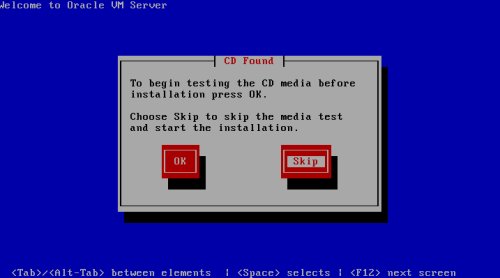
If you need to do a media test, then tab to the "OK" button and press the "Return" key, otherwise tab to the "Skip" button and press the "Return" key.
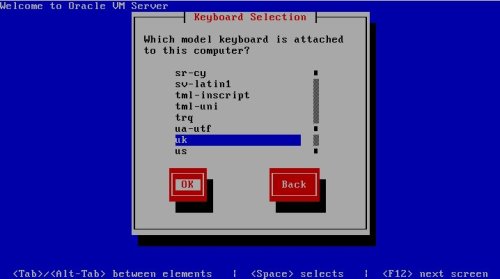
Select the required keyboard layout, tab to the "OK" button and press the "Return" key.
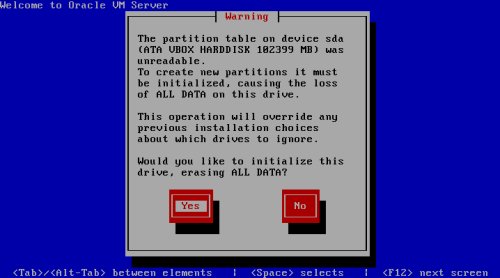
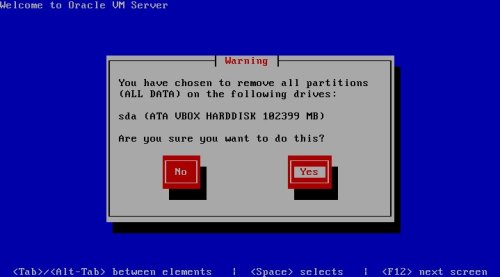
Confirm the partitioning warning by tabbing to the "Yes" button and pressing the "Return" key.
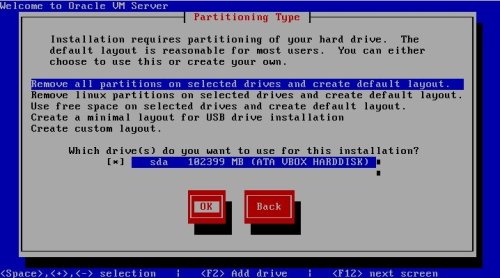
Select the correct drive, tab to the "OK" button and press the "Return" key.
On the warning screen, tab to the "Yes" button and press the "Return" key.
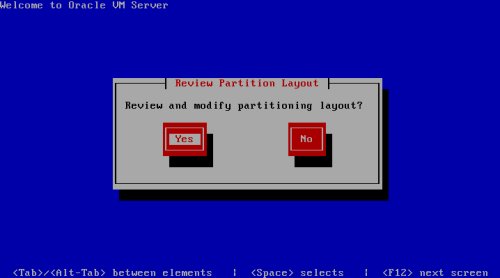
If you wish to review the partitioning layout, tab to the "Yes" button and press the "Return" key.
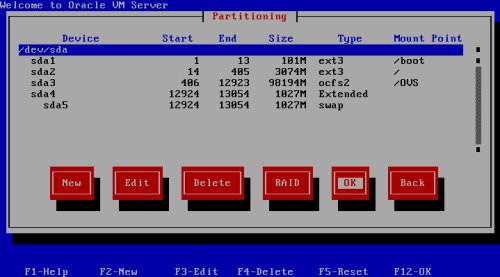
If you are happy with the partition layout, tab to the "OK" button and press the "Return" key.
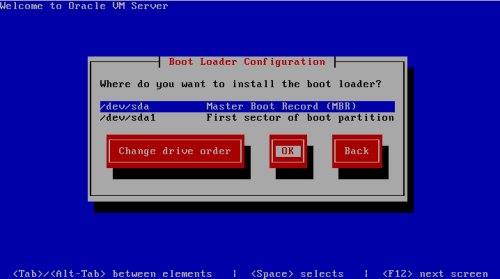
Select the preferred boot loader configuration, then tab to the "OK" button and press the "Return" key.
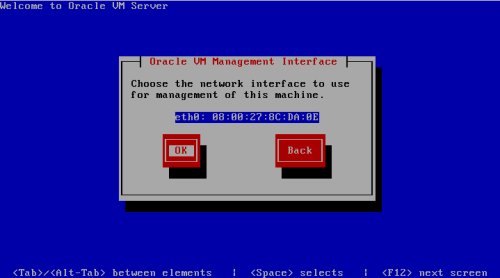
Select the network interface for the management interface, tab to the "OK" button and press the "Return" key.
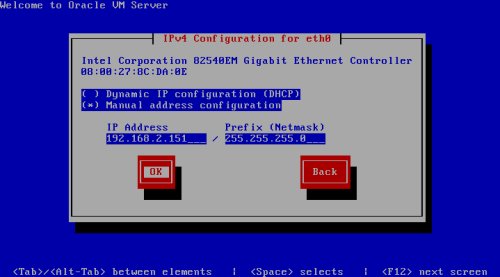
Enter the relevant network configuration, tab to the "OK" button and press the "Return" key.
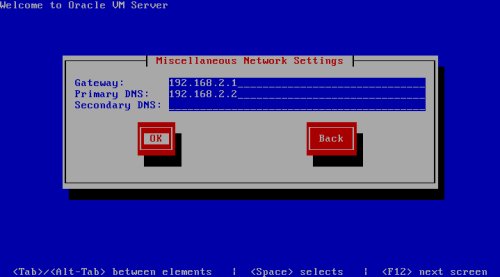
Enter the gateway and DNS information, tab to the "OK" button and press the "Return" key.
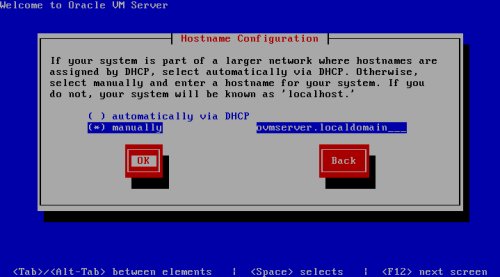
Enter the hostname information, tab to the "OK" button and press the "Return" key.
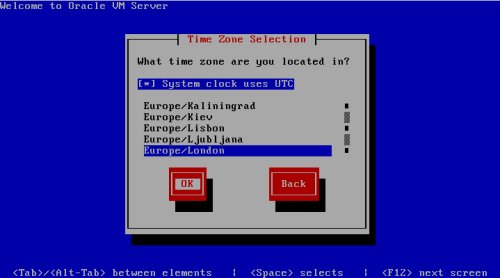
Select the relevant timezone, tab to the "OK" button and press the "Return" key.
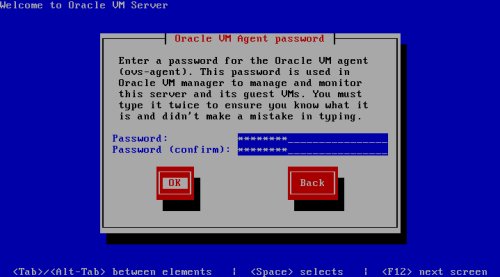
Enter the agent password, tab to the "OK" button and press the "Return" key.
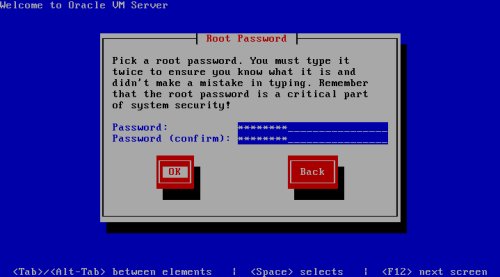
Enter the root password, tab to the "OK" button and press the "Return" key.
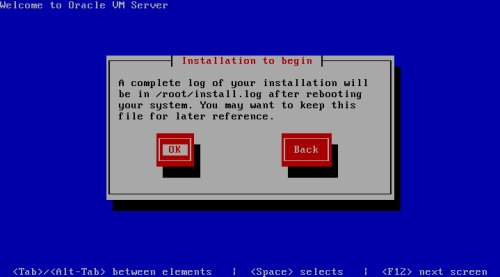
On the review screen, tab to the "OK" button and press the "Return" key.
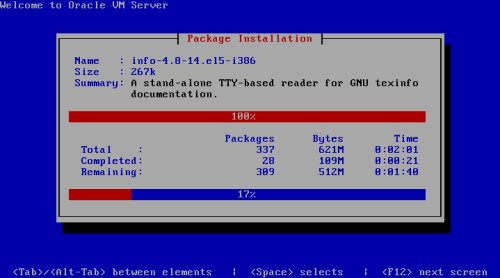
Wait while the installation takes place.
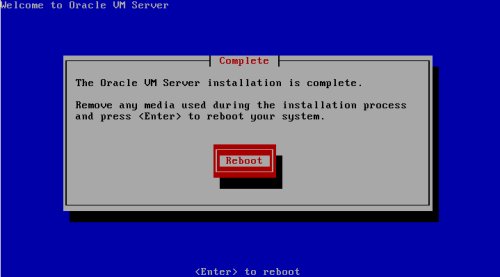
Once complete, press the "Return" key to reboot the server.
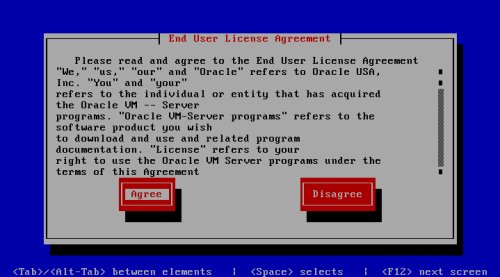
On the license agreement screen, tab to the "Agree" button and press the "Return" key.
You are then presented with the console screen.
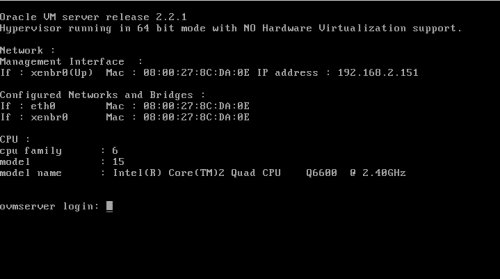
Log in to use the command line for management tasks, or install the Oracle VM Manager software on a separate server.
Oracle VM Manager
The Oracle VM Manager is installed on a separate server running 32-bit or 64-bit Linux. In this article it was installed on Oracle Enterprise Linux (OEL) 5.5 (64-bit) with a minimum of 2G RAM, 4G swap and firewall and secure Linux disabled. The OEL installation included the following package groups:
- GNOME Desktop Environment
- Editors
- Graphical Internet
- Text-based Internet
- Development Libraries
- Development Tools
- Server Configuration Tools
- Administration Tools
- Base
- System Tools
- X Window System
An example of this type of Linux installations can be seen here.
The only prerequisite for OVM Manager is the libaio package. If you have performed the installation described above this package will already be installed. If not, then make sure you install the package as follows from the "root" user.
# From Enterprise Linux 5 DVD
cd /media/cdrom/Server
rpm -Uvh libaio-0.*
cd /
eject
Next, mount the OVM media as the "root" user.
# # Real CD or DVD.
# mkdir /media/cdrom
# mount /dev/cdrom /media/cdrom

# # ISO image.
# mkdir /media/cdrom
# mount -o loop,ro OracleVM-Manager-2.2.0.iso /media/cdrom
Then start the installation as the "root" user. The installation requires decisions to be made about the type of installation along with several passwords. The user entry for this installation is shown in bold.
# cd /media/cdrom
# sh runInstaller.sh
Welcome to Oracle VM Manager 2.2

Please enter the choice: [1|2|3]
1. Install Oracle VM Manager
2. Uninstall Oracle VM Manager
3. Upgrade Oracle VM Manager
1

Starting Oracle VM Manager 2.2 installation ...

Do you want to install a new database or use an existing one? [1|2]
1. Install a new Oracle XE database on localhost
2. Use an existing Oracle database in my network
1

Prepare to install the Oracle XE database ...
Checking the supported platforms ... Done

Checking the prerequisite packages are installed ... Done

Checking the available disk space ... Done

Installing the oracle-xe-univ package (rpm) now ...
 Done


Oracle Database 10g Express Edition Configuration
-------------------------------------------------
This will configure on-boot properties of Oracle Database 10g Express
Edition.  The following questions will determine whether the database should
be starting upon system boot, the ports it will use, and the passwords that
will be used for database accounts.  Press <Enter> to accept the defaults.
Ctrl-C will abort.

Specify the HTTP port that will be used for Oracle Application Express [8080]:

Specify a port that will be used for the database listener [1521]:

Specify a password to be used for database accounts.  Note that the same
password will be used for SYS and SYSTEM.  Oracle recommends the use of
different passwords for each database account.  This can be done after
initial configuration:
Confirm the password:

Do you want Oracle Database 10g Express Edition to be started on boot (y/n) [y]:

Starting Oracle Net Listener...Done
Configuring Database...Done
Starting Oracle Database 10g Express Edition Instance...Done
Installation Completed Successfully.
To access the Database Home Page go to "http://127.0.0.1:8080/apex"

Checking the availability of the database ...

Set default database schema to 'OVS'.
Please enter the password for account 'OVS':
Confirm the password:

Creating the Oracle VM Manager database schema ...Done

Installing the ovs-manager package (rpm) ...
Done

Installing the oc4j package (rpm) ...
Done

Please enter the password for account 'oc4jadmin':
Confirm the password:

Starting OC4J ... Done.
To access the OC4J Home Page and change the password go to http://127.0.0.1:8888/em

Deploying Oracle VM Manager application to OC4J container.
Creating connection pool ... Done
Creating data source ... Done
Deploying application help ... Done
Deploying application ... Done

Please enter the keystore password for the Web Service:
Confirm the password:

Setting keystore password for Web Service ... Done
Do you want to use HTTPS access for Oracle VM Manager (Y|n)?Y

Configuring OC4J to use HTTPS ... Done
Stopping OC4J ... Done
Starting OC4J ... Done

Please enter the password for the default account 'admin':
Confirm the password:

Configuring SMTP server ...
Please enter the outgoing SMTP mail server(e.g. - mail.abc.com, mail.abc.com:25): localhost
Mail server checking, may need some time, please wait ...
Setting the SMTP server to localhost ...
Done

Please enter an e-mail address for account 'admin': root@localhost
Confirm the e-mail address : root@localhost
Updating e-mail address for account 'admin' to 'root@localhost' ...
Done

The console feature is not enabled by default.
For detailed setup, refer to Oracle VM Manager User's Guide

Installation of Oracle VM Manager completed successfully.

To access the Oracle VM Manager 2.2 home page go to:
  https://192.168.2.152:4443/OVS

To access the Oracle VM Manager web services WSDL page go to:
  https://192.168.2.152:4443/OVSWS/LifecycleService.wsdl
  https://192.168.2.152:4443/OVSWS/ResourceService.wsdl
  https://192.168.2.152:4443/OVSWS/PluginService.wsdl
  https://192.168.2.152:4443/OVSWS/ServerPoolService.wsdl
  https://192.168.2.152:4443/OVSWS/VirtualMachineService.wsdl
  https://192.168.2.152:4443/OVSWS/AdminService.wsdl

To access the Oracle VM Manager help page go to:
  https://192.168.2.152:4443/help/help

#
The Oracle VM Manager can then be accessed from the address listed at the end of the installation (https://192.168.2.152:4443/OVS).
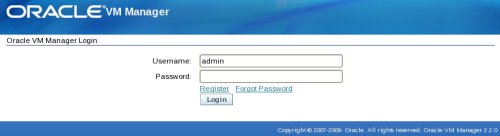
Log in using the "admin" user along with the password entered during the installation.
For more information see:
- Oracle VM Release 2.2 Documentation
- Oracle VM Server Installation Guide
- Oracle VM Manager Installation Guide
Hope this helps. Regards Tim...